使用ReadTheDocs构建托管技术文档
前置准备
ReadTheDocs 账号
Github(Gitee)账号
Python环境(如anaconda3)
Typora(最后一个免费版本 0.11.18)(免费版也强制升级了)
VScode
Github新建项目
在github(gitee)上新建项目,如ReadTheDocsNote
Sphinx安装与测试
打开Anaconda Prompt
安装环境
# 安装sphinx
pip install sphinx
# 安装sphinx-autobuild
pip install sphinx-autobuild
# 安装主题
pip install sphinx_rtd_theme
# 安装markdown插件
pip install recommonmark
# 安装markdown表格插件
pip install sphinx_markdown_tables
构建项目文档
# 将刚才在github(gitee)新建的项目,克隆到本地
git clone git@gitee.com:dimwalker/ReadTheDocsNote.git
# 切换目录
cd ReadTheDocsNote
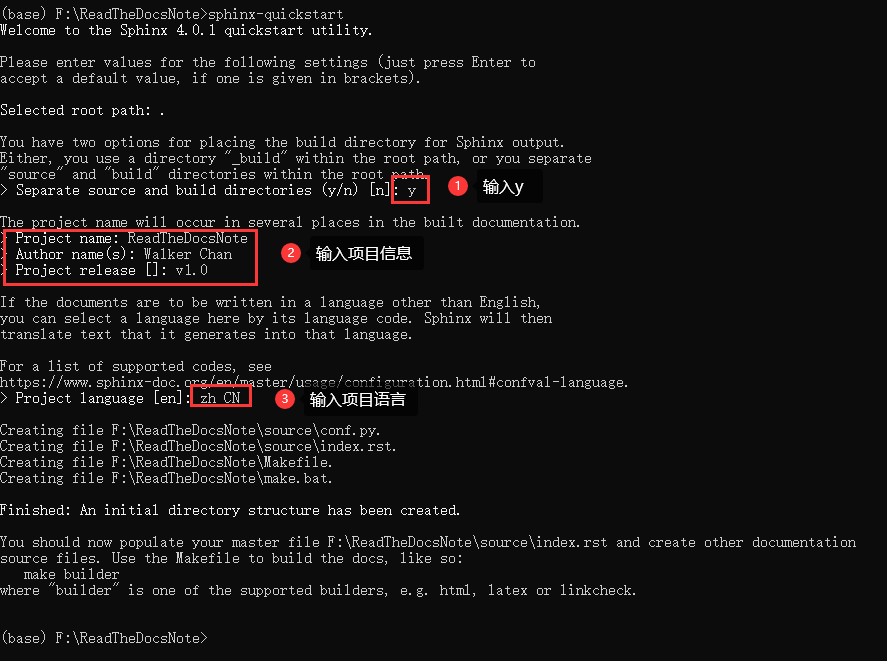
# 创建项目
sphinx-quickstart
按提示设置项目文档信息
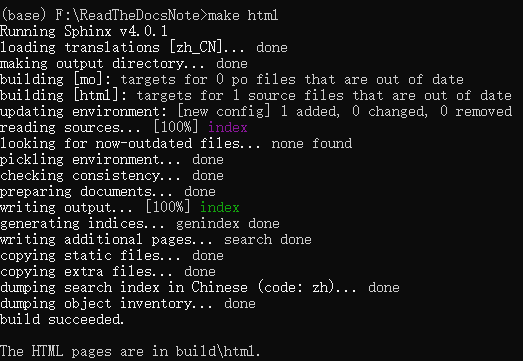
编译
make html
查看页面效果
方式1,直接双击 build/html/index.html
方式2,部署http服务器
# 启动服务
sphinx-autobuild source build/html
更换主题
默认主题是alabaster,ReadTheDocs上常见的主题是sphinx_rtd_theme
其他注意可以访问 https://sphinx-themes.org/
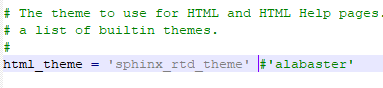
修改conf.py
html_theme = 'sphinx_rtd_theme'
配置Markdown
Sphinx默认只支持reST格式,Markdown需要安装插件
修改conf.py
extensions = ['recommonmark','sphinx_markdown_tables']

再次编译查看效果
使用Typora编写md文档
点击查看详细内容
- 修改 偏好设置 -> 图像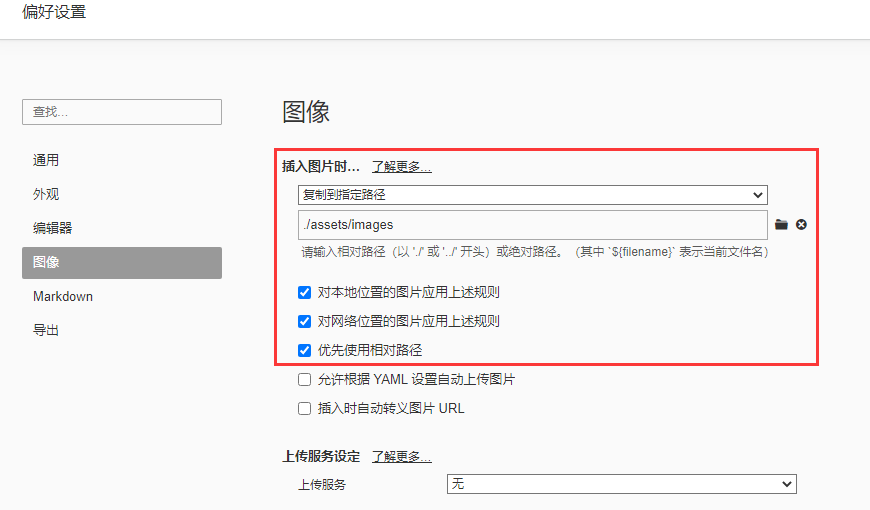
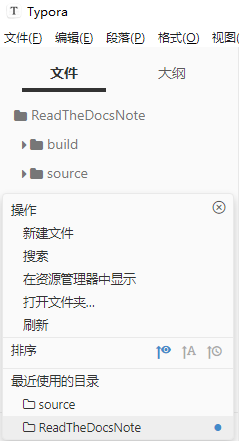
打开 视图 -> 文件树
如果路径不在项目上,点击最下面,打开文件夹
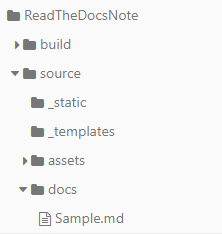
新建md文档
在目录右键,新建docs/Sample.md
# 一级标题
## 二级标题
### 三级标题
#### 四级标题
##### 五级标题
使用VScode编写MarkDown
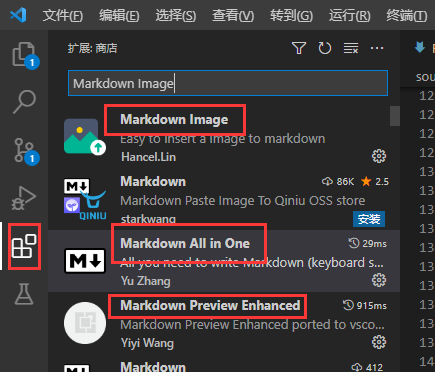
安装插件
Markdown All in One
Markdown Preview Enhanced
Markdown Image
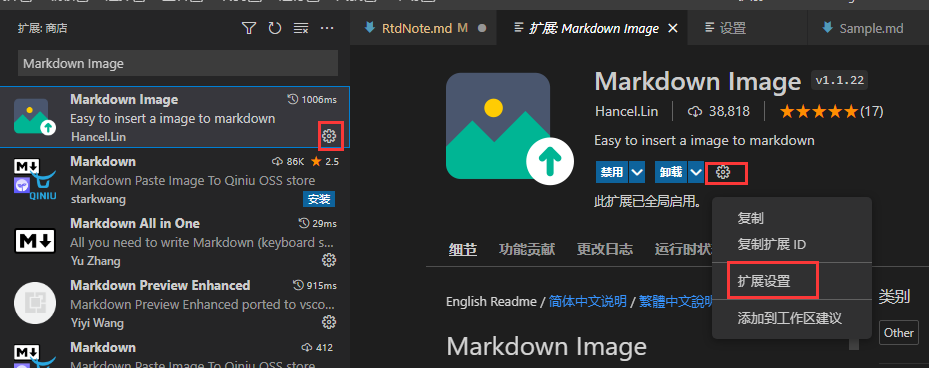
修改插件配置 点击对应插件的小齿轮,再点击扩展设置,可以修改控件的设置 默认设置即可
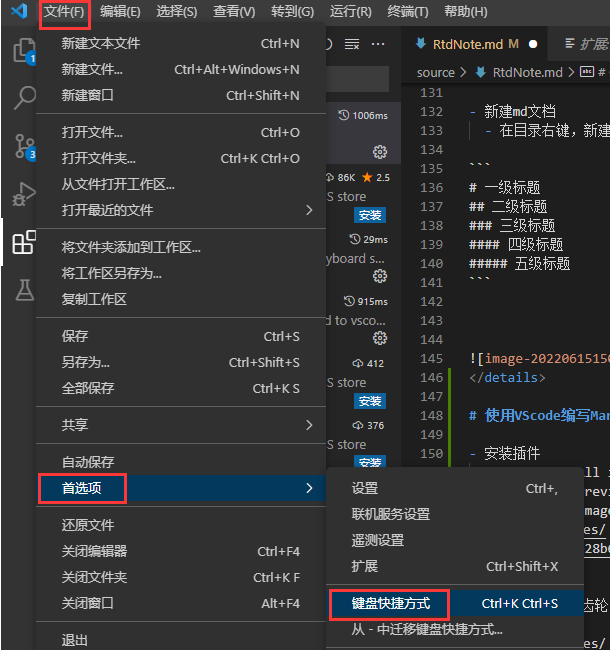
修改插件快捷键
依次点击 文件 -》 首选项 -》 键盘快捷方式
搜索Markdown All in One,修改Toggle code block的快捷键及条件
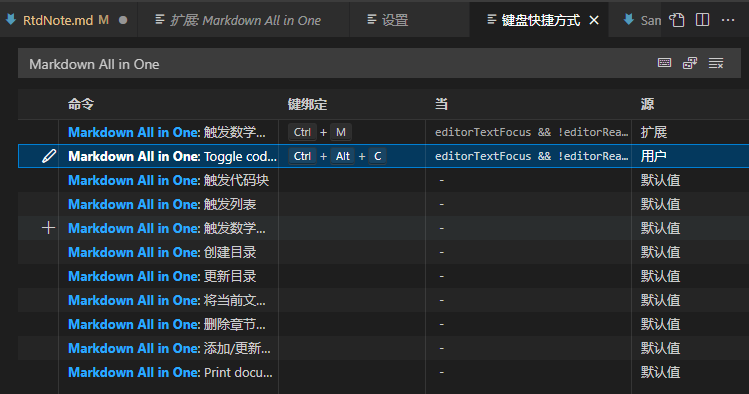
粘贴图片的快捷键默认是shift + alt + v,按需修改
编写编译所需的文件
新建source/index.rst,使用其他编辑器编辑该文件
Sample Markdown
=================================

.. toctree::
   :maxdepth: 2

   docs/index
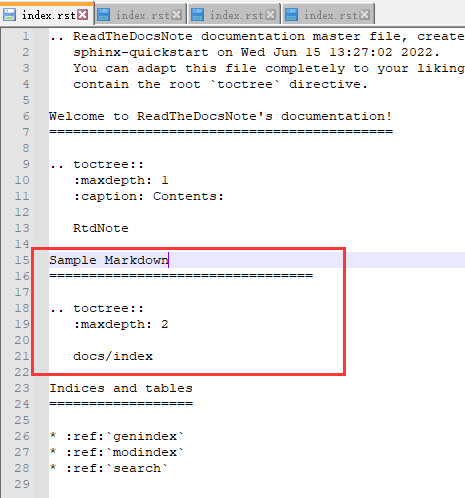
新建source/docs/index.rst,编辑
Sample Markdown
=================================

.. toctree::
    :maxdepth: 1

    Sample
在项目根目录新建.gitignore文件
build/
新建requirements.txt
alabaster==0.7.12
appdirs==1.4.4
Babel==2.9.1
beautifulsoup4==4.9.3
bs4==0.0.1
certifi==2020.12.5
chardet==4.0.0
colorama==0.4.4
commonmark==0.9.1
cpplint==1.5.4
distlib==0.3.1
docutils==0.16
fake-useragent==0.1.11
filelock==3.0.12
fishbase==1.3
flake8==3.9.2
idna==2.10
imagesize==1.2.0
importlib-metadata==3.9.1
importlib-resources==5.1.2
install==1.3.4
Jinja2==3.0.1
livereload==2.6.3
Markdown==3.3.4
MarkupSafe==2.0.1
mccabe==0.6.1
packaging==21.0
pycodestyle==2.7.0
pyflakes==2.3.1
Pygments==2.9.0
pyparsing==2.4.7
python-dateutil==2.8.1
pytz==2021.1
PyYAML==5.4.1
recommonmark==0.7.1
redis==3.5.3
requests==2.25.1
six==1.15.0
snowballstemmer==2.1.0
soupsieve==2.2.1
Sphinx==4.0.3
sphinx-autobuild==2021.3.14
sphinx-markdown-tables==0.0.15
sphinx-rtd-theme==0.5.2
sphinxcontrib-applehelp==1.0.2
sphinxcontrib-devhelp==1.0.2
sphinxcontrib-htmlhelp==2.0.0
sphinxcontrib-jsmath==1.0.1
sphinxcontrib-qthelp==1.0.3
sphinxcontrib-serializinghtml==1.1.5
tornado==6.1
typing-extensions==3.7.4.3
urllib3==1.26.4
virtualenv==20.4.3
zipp==3.4.1
上传项目到Github(gitee)
git add .
git commint -m "update"
git push
ReadTheDocs新建项目
创建ReadTheDocs项目
进入地址 https://readthedocs.org/dashboard/
导入项目

手动导入

填写名称,代码库地址,勾选高级选项
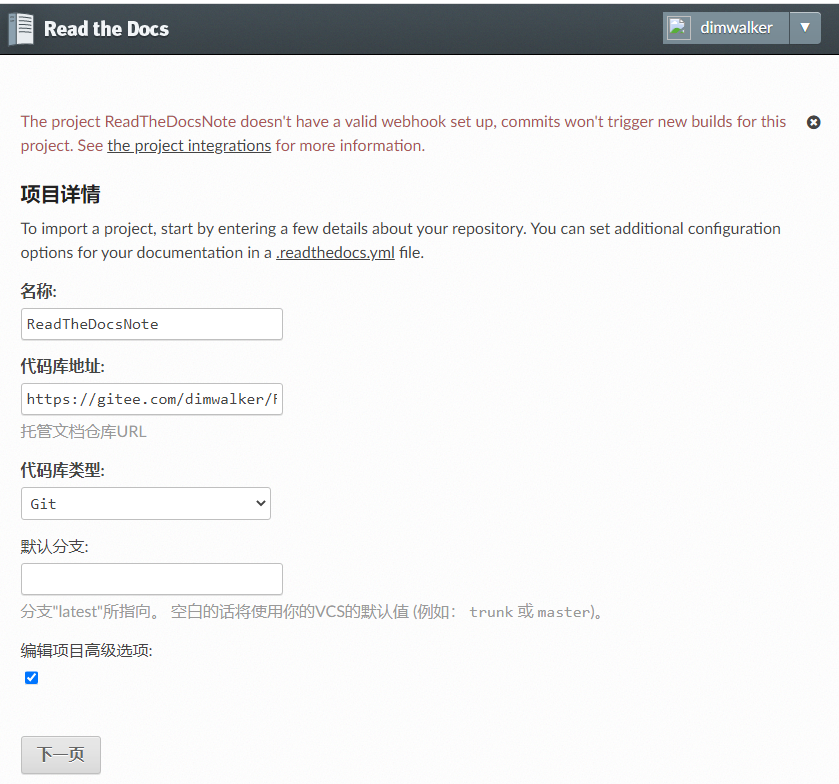
选择语言
这个设置会影响readthedocs的默认url。 并且新建之后再改,居然是不生效的?

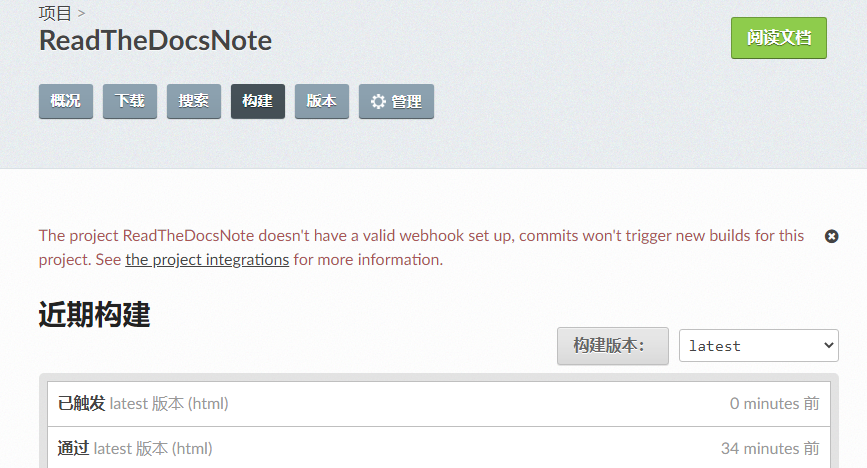
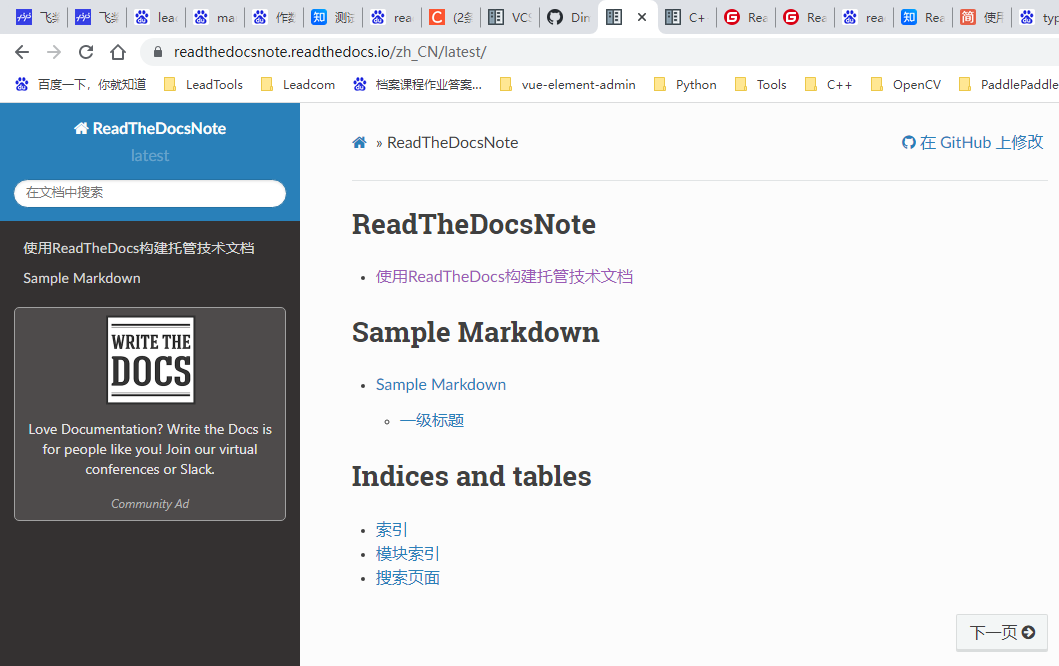
等待构建完成
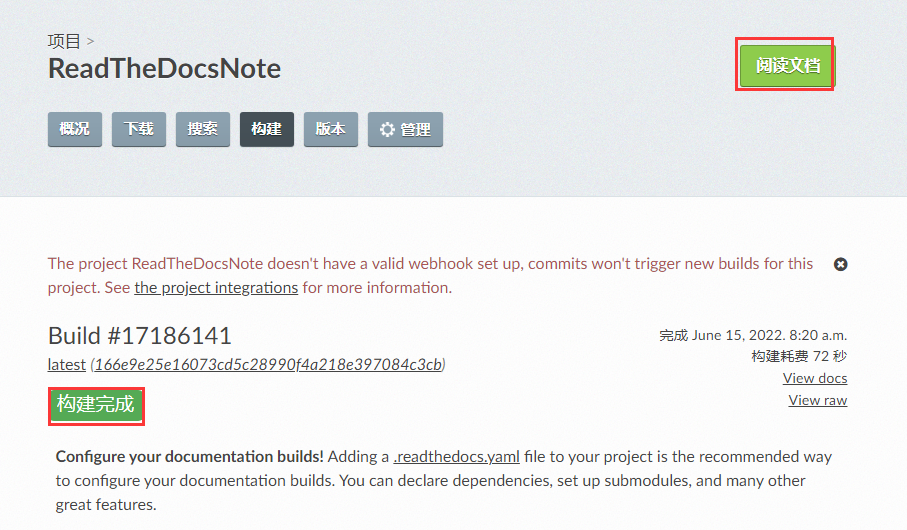
完成后点击阅读文档,查下效果
自动构建
官方说明文档见 https://docs.readthedocs.io/en/stable/integrations.html#github
在ReadTheDocs上,设置集成
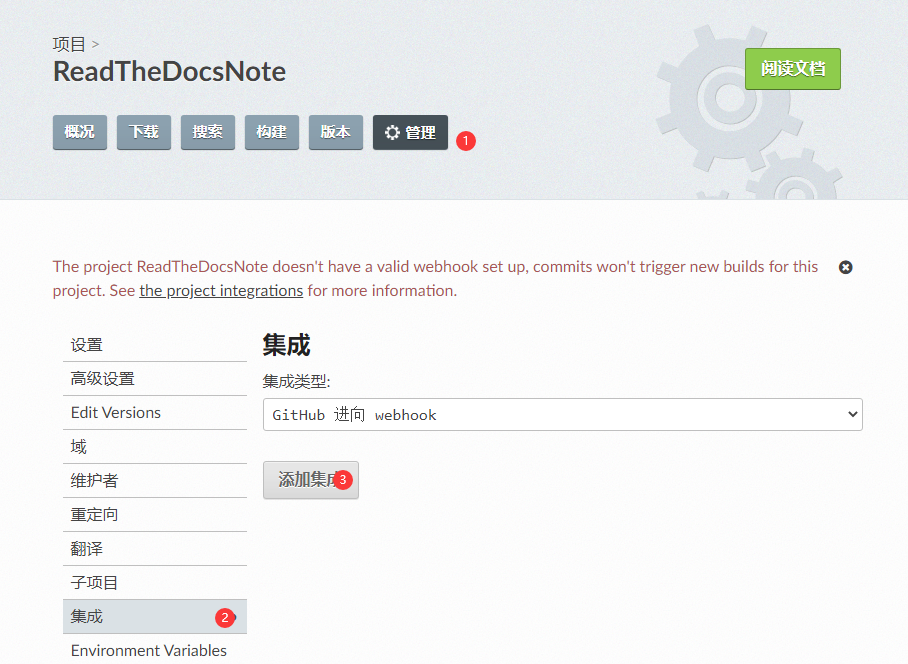
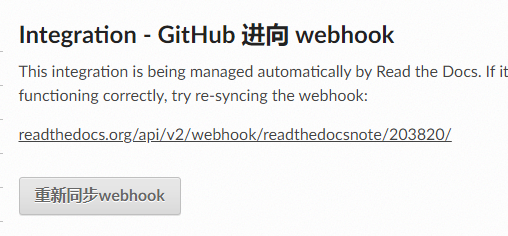
复制这个url
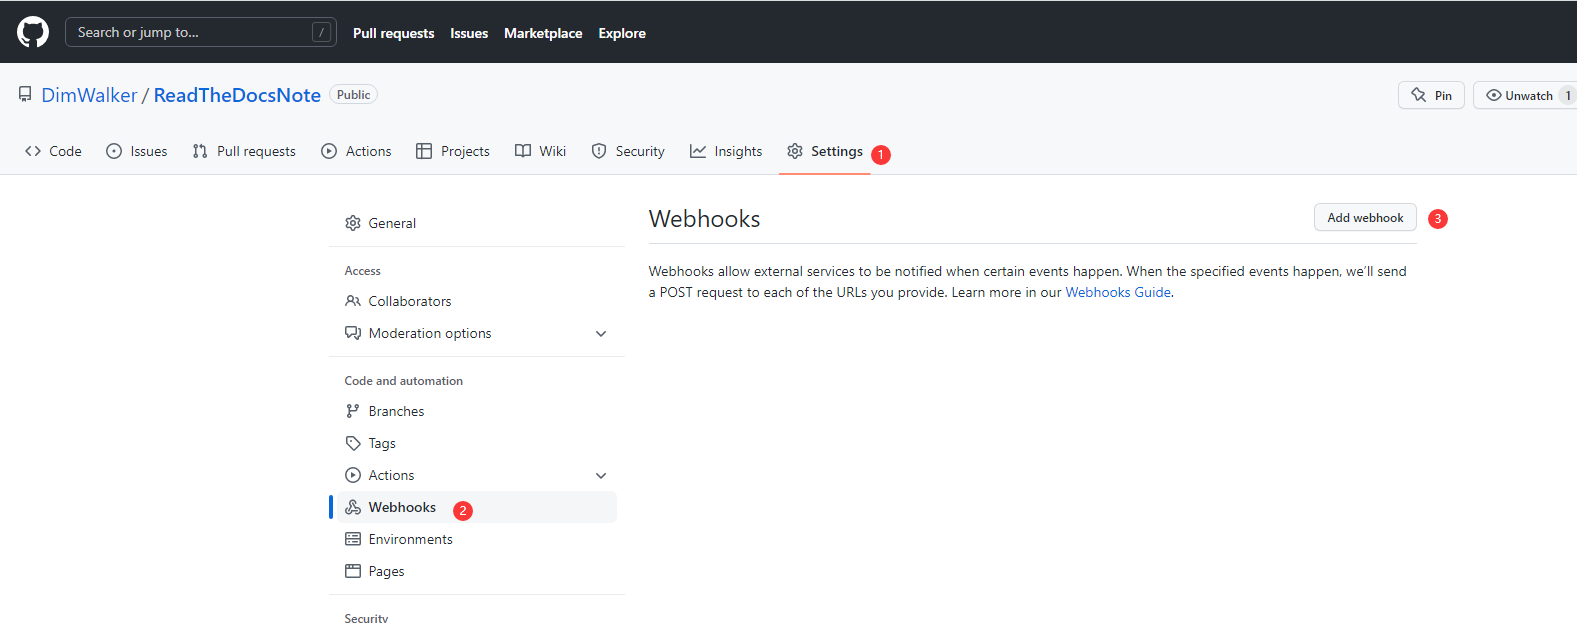
在Github上,设置Webhooks
将刚才复制的Url,粘贴到Payload URL
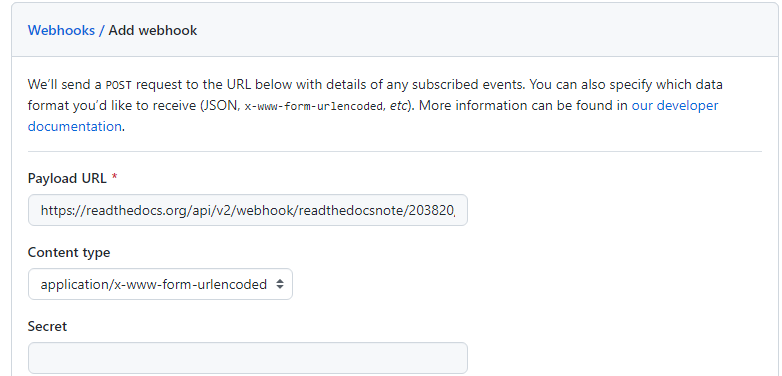
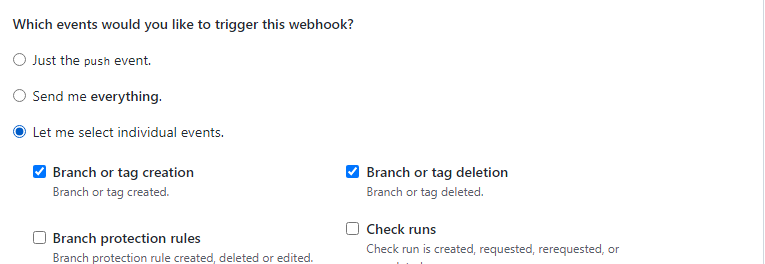
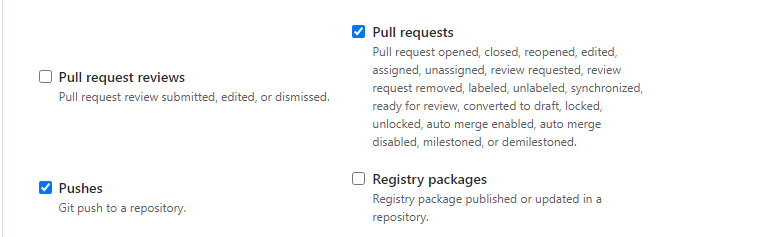
设置事件
勾选Branch or tag creation, Branch or tag deletion, Pull requests, Pushes.
修改Sample.md,提交github
等待自动构建完成,查看效果。